We’re making a new modernist

Dsc 0016-6Yea! It's been top secret until now, but today we are breaking the great news to all our families that we are pregnant. Thirteen weeks four days pregnant to be exact. As you can imagine we are both elated, and slowly counting the days until the little fellows grand entrance into this world. That means that there is sure to be some great baby content coming here on GRM. It also means that the pressure is on to get our house finished. I think we should have no problem getting all our ducks in a line in the next 185 days.

Comments? Post them here in the forums.

Trying to get a loan

 Secured-LoansCan I just tell you what a pain it is to try and get a new construction loan. It absolutely amazes me how much time, effort and money you have to put into it before you are even ready to apply. We are currently racing the weather clock to try and see if we can get this project done before snow is on the ground. I have bids from the roofer, and millwork and thats about it. I finally got a hold of the drywall guys today, so I should have a bid from them on Wed. Still waiting for bids from electrical, framers (who will be doing siding too) windows and doors. I haven't even been able to find a concrete guy yet, and I haven't even thought about painters. After all that I just have to cross my fingers that the bids will come in low enough. Comments? Post them here in the forums.

It’s official, almost

Dsc 0002-7Let me just say, yesterday was a good day. The stars aligned over our little 700 square foot house, and the results were great. Not only did we finally get our drawings completed and stamped by the architect and engineer, we were also able to get out building permit! It was the culmination of an entire summers work coming together in one $1,200 dollar bang. That is the cost of a building permit on a addition valued at $48,000. Note to self, additions are not affordable. The thing that kills me is how much money you have to spend before you can even get your loan. You've got architectural fees which are a couple grand, engineer fees, around a grand, building permit, at least a grand, inspection is a couple hundred. You could easily spend $5,000 out of pocket before the bank will even consider a loan. Speaking of loans, before I can get ours, I need to bid out the entire project. Since I will be acting as general contractor, I am looking for some good subs. Anyone know of any local? In particular I am looking for a good concrete guy, roofer, drywall and roofer. Any suggestions will be welcome. As soon as I can get all my written bids together, I can get my loan, and break ground. It looks like we might even get it all done this year if we hurry.

Comments? Post them here in the forums.

Ipevo Skype Phone

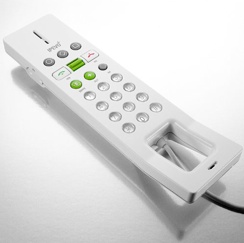
200611091001Lets face it, land lines are on their way out. Most of my friends, and family don't have land lines, they just rely on their cell phones for everything. Since my wife and I have been married, we have never had a landline. Unfortunately that can make for some expensive cell phone bills. So in an effort to save some minutes, especially with the holidays coming up, we got a Skype phone. For those who don't know Skype it is an "over the internet" phone system. Computer to computer calls are always free. Computer to landline calls are free until the end of the year, then outgoing calls will be $0.02 a minute, and incoming are $40 a year when you buy a Skype in number. So when we are at home we forward all our calls to our Computer. The secret to making the whole thing work is a decent Skype Phone. Thats where the IPEVO Free-1 phone comes in. It's got nice style, and great sound quality, and best of all it's affordable. Available from IPEVO for $35. Comments? Post them here in the forums.
Bathroom Window

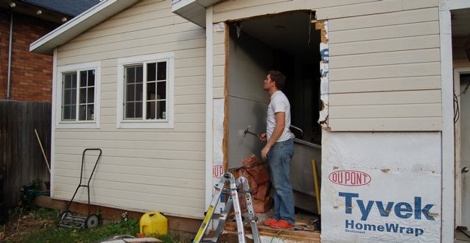
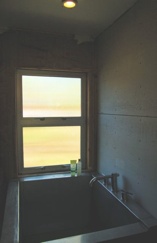
Dsc 0011-2Dsc 0020-4Just when you thought I was out of walls to knock down. I finally got around to installing our Milgard window in our bathroom. It (like many of our projects) has been sitting in our living room for almost a month now. I didn't really plan on making hole quite that big, but some of the old sheathing was water damaged from the poor installation of the previous window. I ended up just ripping it all out, framing in a new wall and installing the new window. Install was a breeze, and it looks really nice. The window was a special order from Homedepot. It's a Milgard thermally broken aluminum awning window. We went with the narrow reed for some tasteful privacy. It ended up running us close to $800.

Comments? Post them here in the forums.

Bathroom Mirror

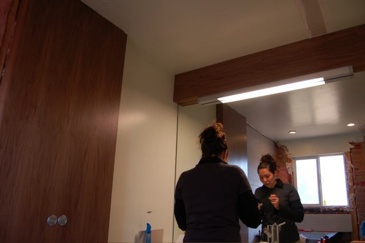
Dsc 0007-5Our bathroom is long overdue for a little handy work. Last week I finally got a chance work on it a little. I mentioned previously that we had our mirror put in, but failed to mention it didn't quite go as planned. The mirror was supposed to go all the way to the ceiling, but because of the walnut surround on the toilet, and the sink being mounted, it didn't happen. They ended up having to make a field cut (and a crooked one at that) to get it maneuvered into place. This left us with a 12" gap above the mirror that we had to fill. I ended up making a nice walnut detail that protrudes out similar to the toilet surround. It also gave us a nice place to mount our vanity light. Overall I think it turned out pretty nice. Comments? Post them here in the forums.

Ron Rezek 2 squared light

200610292007I wanted to talk a little more about the light in our bathroom. We splurged a little here, because we just couldn't find something simple and affordable. In fact, compared to a lot of other choices, this was actually very affordable. The 2 squared light is a simple anodized aluminum housing for a T5 fluorescent bulb. It is (you guessed it) two inches by two inches, and available in several different lengths. We opted for the 50" high output model. It cost us $229 shipped through our local Artemide dealer The Light Spot. We love that the aluminum will match our new bathroom window, and we love the look of it. The light quality of it is very nice, if mounted correctly. We tested out some mounting arrangements and found that when mounted up high, with the diffuser out the light quality was not very good. I was surprised because this is how it is shown with the 2 squared mirror. Luckily by turning it to face down the lighting improved dramatically.

Comments? Post them here in the forums.

Reader advice needed.

Dsc 0002-4This is the last wall in our front room to drywall. I have been toying around with the idea of leaving the brick and original timbers exposed. The brick is the original adobe brick used for insulation. I think I would have to do something to make it a little more secure, I have seen exposed brick that has a thin layer of fiberglass over it to secure it and keep the dust down, so thats probably what I would do.

{democracy:3}

It only took 1 year

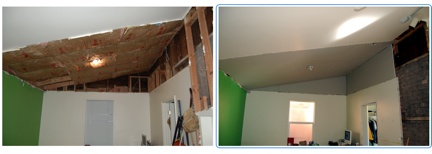
200610231154Ok, it was a little less than a year since we tore down the wall and ceiling of our bedroom. I can't tell you how nice it is to finally have it all sheetrocked. I thought that it was going to be a horrendous experience, but thanks to a drywall lift, it wasn't that bad at all. When it comes to taping and mudding though, I don't want to even try. We are currently looking around for someone local that is cheap and good. Comments? Post them here in the forums.

Drywall Day

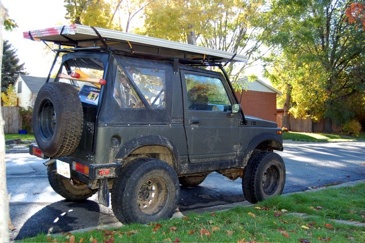
Dsc 0045Well I finally decided to do the drywall myself. Our bedroom/livingroom has had exposed insulation on the ceiling and upper walls for almost a year now. I kept waiting to have enough money to pay someone else to do the drywall, but it never happened. I finally decided last night that we would never have and extra $1,500 laying around, and I should just buck up and do it. So early this morning I took the little Samurai that could to Home Depot, and picked up six sheets of drywall (thats about all I dared carry) and a drywall lift and a little giant ladder. Let the fun begin. Comments? Post them here in the forum.

Bent wood tables

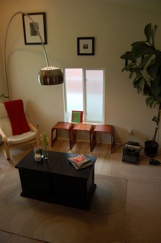
Dsc 0003-6We got our bent wood tables from The Company Store today. Over all, I am pretty happy with our purchase. I opted to get the walnut, which unfortunately isn't a real walnut, but just a darker stain on the birch. We were a little excited when we got them, and ordered 4 of them. I had hoped that even though they were "tables" that we would be able to use them as benches. Our house has seriously been lacking guest seating since we gave our futon couch away last year. They actually feel pretty sturdy, and I think it will work out fine. One of them is a little warped and doesn't quite sit flat, which is a bit of a bummer. I just have to keep reminding myself it cost less than my dinner last night. Comments? Post them here.

Dsc 0016-3 Dsc 0014

The last wall down

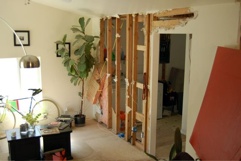
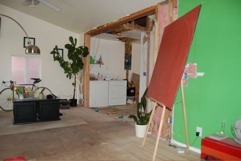
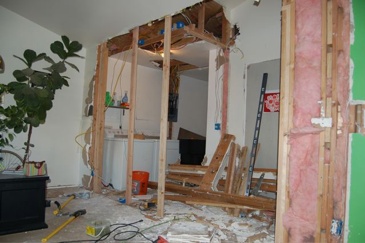
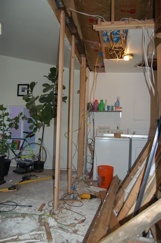
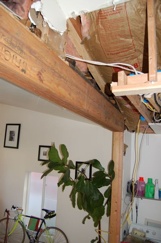
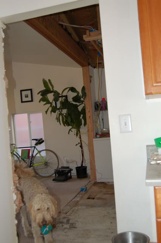
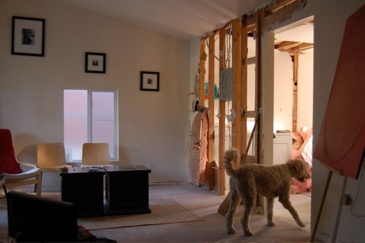
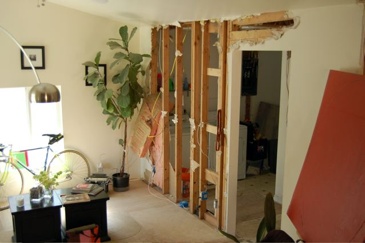
Dsc 0001 3Dsc 0001-7Last week I posted on how I moved the breaker panel so that I could tear down the last wall. Well this Monday, I finally had a chance to get to it. This was probably some of the scariest demo I have done on this house. The wall was a load bearing wall, and a fairly complicated one too. It supported the original roof of the house (a shed roof which has more recently been buried under your standard double pitch roof) a ledger that the ceiling beams hang off of in the living room, and the ceiling in the laundry room. I managed to carefully brace every couple of feet as I ripped down the old wall. When I got the whole wall down, all I had to do was slip in the new beam that spans the distance, and remove the temporary bracing. About that beam. I was nervous before I started about what to use, so I went to the local home depot and asked them. They assured me that you should never mess with a structural wall without consulting a structural engineer first. Not what I wanted to hear. The good news is that they referred me to a local structural engineer that gave free consults over the phone. I called the guy up, and he was super nice. I gave him the specs of the house and all the span lengths etc. He recommended using three 1 3/4" x 9" microlam beams (also known as LVL's) nailed and glued together. Easy enough. It came to about $130 for the three of them. Well worth it to know that our house isn't going to fall down next time it snows.

During and after pics after the jump.

Comments? Post them here.

Dsc 0001 2-3 The bracing during the demo.

Dsc 0005-6 Supports viewed from the kitchen.

Dsc 0007-3 The beam.

Dsc 0003-5 The open view from the kitchen.

The last wall

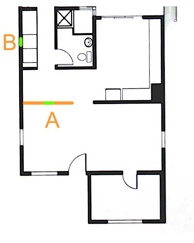
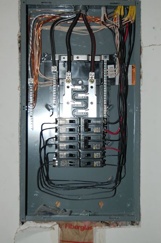
WalldemoThere certainly has been no shortage of demo on our little house. We have just one wall to go before we can start to patch things back up again, unfortunately this is a tricky one. The wall in question is the orange one shown in the plans to the left. First off, it is a structural wall, so when the final demo happens it will have to be carefully braced while a load bearing beam can be slipped into place. The second problem was that little green spot shown on wall "A". That was where our houses breaker panel was, making it impossible to tear down the wall until it was moved. This week I finally got around to moving the panel to spot "B" across from the bathroom. I took the chance to update the panel to a new one that can accommodate our addition. Everything went smooth, and I had it all switched out in one day. Now I just need brace the wall, finish the demo, and slip in a new beam. Pictures of the wall before and after shown after the jump.

Comments? Post them here.

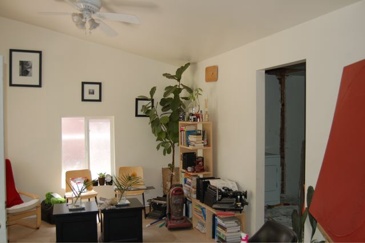
Dsc 0012-2 Before the demo.

Dsc 0013-5 The panel needing to be moved.

Dsc 0001 2-2 After the panel was moved.

Dsc 0003-4 The new panel.

Bentwood Tables

 Hanoverassets Tcs Large Images Csk05Xl82If you have been reading Grassroots Modern for long, you probably already know that I am a huge fan of anything bentwood. That is why I was so excited when Ralph, a Grassroots Modern reader, emailed me last night about the Bentwood Tables on sale over at The Company Store. The table with magazine rack shown to the right is on sale for $22, and the table without the magazine rack is on sale for TWO for $29. Yep, you heard me two. They are both available in Walnut (my new favorite) and Birch. I though it was such a good deal I bought 4. Maybe that was a little overboard. Now I just need to figure out where to put them all... Available at The Company Store. Two tables for $29 or one table/magazine rack for $22.

Comments? Post them here.

Bathroom Update

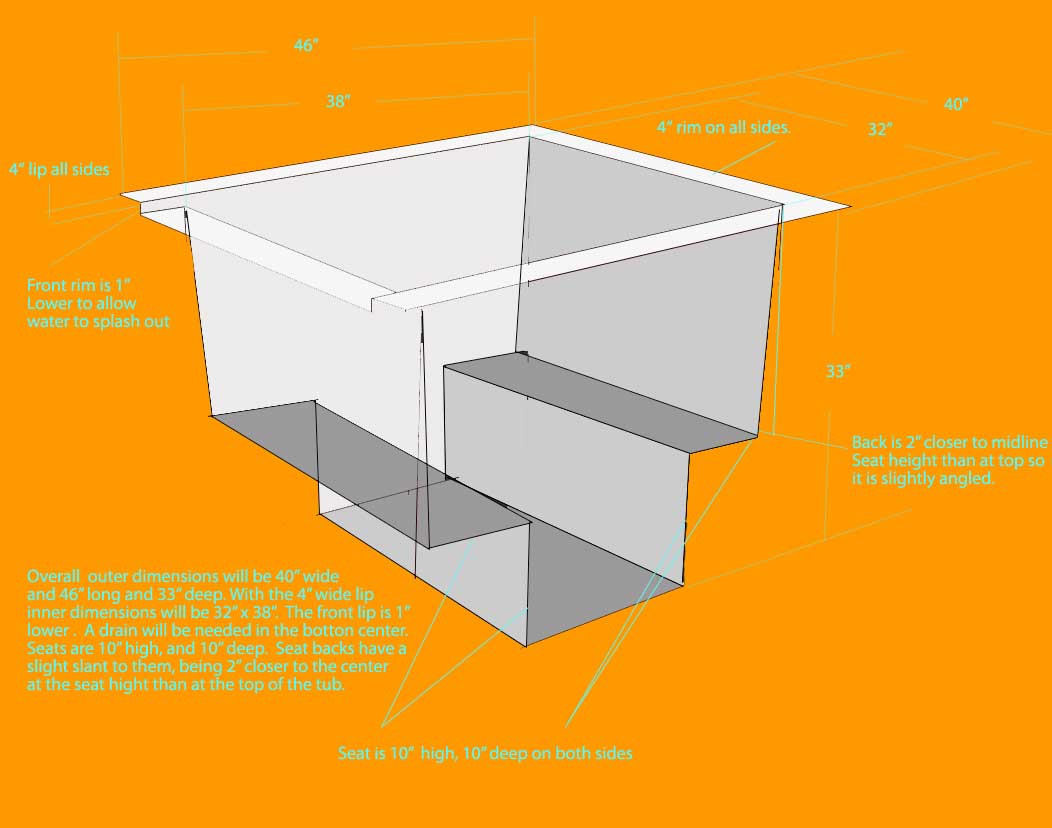
Dsc 0010 2Well after several weeks of waiting, we finally started to make some more progress in the bathroom. For a little background, check out this post about our ofuro tub plans. I'll give more details about the tub later. We finally decided on a tub filler for our ofuro. We ended up going with the Danze Parma, mostly because it fit our style, and more importantly, our budget. That doesn't mean of course that it was really affordable. It ended up being right around $300, which seems like a lot of money until you see what the other options are. Before we could put our ofuro tub in, we had to rip out the old shower and tub. It turned out to be a pretty easy job with only one big surprise. The wall below the window was mostly rotted out from water damage. Luckily we plan on replacing that whole window, and so we will need to frame out that section of the wall again anyway. Getting the ofuro in place was fairly straight forward. It was a lot lighter than the other tub. I lined the two side walls with dura rock, so we will be ready to tile them soon. We were kind of nervous that our boiler and water heater would have a hard time filling the huge tub. I think we figured it was over 100 gallons pretty easy. To our pleasant surprise, our boiler did just fine. The tub accommodates two people quite comfortably. My wife and I spent about an hour soaking in it the first night it was done. We also had our mirror delivered finally, which makes the bathroom feel a lot bigger. Check out the pics after the jump to see what I mean.

Dsc 0013-3 Dsc 0009

Dsc 0007-2

Dsc 0012-1 Dsc 0011

FInished the Caroma

Dsc 0051Well, I finally wrapped up another small project. I have had our Caroma Walvit toilet hooked up and functional for about a week now, but I was waiting until I had the walnut section done to post about it. So far we are liking the toilet, although I am still not sure if it was worth the money. The whole dual flush thing does make me feel good about myself though. Who knows, another 50 years and it will pay itself of in the water we are saving.Today I finally had time to build the walnut column that the toilet hangs from. It is made out of the exact same material as our vanity I did a while ago, so it is a nice match. We are planning on doing white tiles on all the walls, so I think that the walnut will break things up nicely. Plus it lines up with the doorway exactly, so it makes for a pretty dramatic first view into the bathroom. Now that I've got that out of the way, I can start working on getting our ofuro tub installed.

As always, more pics after the jump.

Dsc 0048

Dsc 0040

Slow Progress

Dsc 0002-1Dsc 0001-4I have been trying to get our Caroma Walvit wall mounted toilet installed since my post last week two weeks ago. Progress has been slow. I finally managed to get the frame that it hangs on secured, and the wall that will be slightly popped out to accommodate the tank framed in. Today I've got the whole day to work on it, so hopefully I will be able to get it all done. I just have to run some copper tube over to it for water supply and hook it into the sewer. After that comes the fun stuff. I am trimming out the wall behind it in walnut to match the vanity. Hopefully tomorrow I will have some good pics of it all done.

Searching for a Toilet

 Products Data Cis Water Wafer Universal ProdI never would have thought that I could spend hours looking for toilets. I also never thought that I would spend more than $200 on a toilet either. Looks like I was wrong on both accounts. Since our bathroom vanity does not go straight to the ground, I didn't want a toilet that did either. The thought of having a floor space that is totally open is very appealing to me both in cleaning and aesthetics. Unfortunately wall hung toilets are nothing close to affordable. I finally decided on the Coroma Walvit, for two main reasons. First the specs said it could be mounted inside a 2x4 wall, which was huge for me, and second it has a dual flush, so it saves on a lot of water. Price tag was a very painful $800 after all the little parts I needed. Ouch. The worst of it is that now that I am going to install it, I find the hardware to do it in a 2x4 wall isn't available in the US, so I will have to add a little detail to accommodate an extra 2". The affordable runner up, which I maybe should have gotten was the Kohler Rialto, which can be had for closer to $250

Concrete countertop installed

Dsc 0001 2-1Last week I promised some pictures of the bathroom vanity that I started making, and of the concrete countertop installed. Well, here they are. The countertop turned out pretty good. There were some small bubble pockets on the top from not vibrating it enough, and there was a small 1" section on the front corner that chipped off. I think the chip was due to messy caulking of the edge causing the concrete to weaken (all the corners of the form get a small smear of caulk to give it a slightly beveled edge). I ended up finishing it with a water based penetrating sealer from The Concrete Exchange and a natural wax on top of that. I highly recommend the sealer, it was great to work with, and looks sweet. For the vanity, I still have to make some drawers for it before it is done, but so far I think it has turned out nicely. You can see in the pictures below some before and after pics. This whole vanity and sink actually sit where the door to the bathroom used to be, which means I had to move all the water and sewer to a new location. As far as prices go, the vanity so far is under $100. It will be closer to $150 after drawer slides and hardware. The concrete countertop comes in around $50, the sink $120, and the faucet $80. Not too shabby.

Dsc 0006 Dsc 0002 2