Blog — Grassrootsmodern.com

DWR House Numbers

 Images Zoom Zm 10242 8I got this tip from my good friend. It looks like DWR is trying to clean out some of their old stock and have slashed prices on all of their house numbers. All the fonts are designed by Erik Spiekermann and are available in four different styles; contemporary, tech, classic and industrial. Prices usually are between $35 - $45 per number, but they are all currently on sale for $10 each. Thats a great deal for these numbers that are only available at DWR. All numbers include all the mounting hardware you need. I really like the contemporary ones myself, but they are all pretty good looking.

Available at DWR for $10 each.

Lucy Ave - Progress

 A154902It has been a long time since the last update and a lot has happened. We finally got our metal panel installed and we are very happy with the results. We had some difficulty getting the right color and we ended up settling for our second choice. It couldn't have worked out any better. The color we ended up with blends in seamlessly with the windows and creates a beautiful, dark, monolithic effect. We ended up using a company be the name of Double T siding. They have been quite quick and reasonable to work with. They will finish on Saturday which is only about five days start to finish. Alta tile came to do the tile in the bathrooms and did a beautiful job. Benchmark came and built an incredible front fence, fences are the norm in the neighborhood and we felt a little out of place without one. Watch for more photos of the fence in the future. Now we just need finish plumbing, heat and railings and we will be ready for a final inspection. -Jacob

 A124893  A114889

Lucy Ave - The list is getting shorter…

 A034880I put in some serious late night hours on monday night getting everything clean and today they started work on our flooring. It is a product called Miracote which is a polymer of some sort. This is poured over the gypcrete and becomes the final floor. We tried to choose a color that would look like the most like natural concrete. They are applying three coats total. This will give the interior of the home a nearly finished look. These photos show it as it is drying and the finished product will be much more consistent than what you see here. As you can see we have functional stairs, finally! Stairs are so much better than ladders. For tread material we used o.s.b. that will get a sanding and a heavy varnish. Benchmark came and finished all of the cedar siding and it looks awesome. They also built our front and back porches and the driveway and sidewalks were poured. We are making great progress. We should be almost entirely finished next week and moving in shortly.  A034879

Boxhouse

 New 090807Ii Img 6441-SmI was checking out this Boxhouse designed by Rob Pyatt and noticed it looks like they used a similar rainscreen detail on the exterior of their house. It's interesting to see it with white underneath instead of black. It makes it look very light and clean. I can't say I envy the person that will have to maintain all that wood though. Boxhouse is an award winning University of Colorado College of Architecture & Planning ( research + design + build ) project.

Check out more pictures here.

Fencing

Dsc 0005 2-4When we ordered our siding we had to order a whole pallet because we were having it painted at the factory. We knew it was going to be more than we needed, and figured we could find something useful for the excess. This weekend we put it to good use. We put up around 24' of fencing on our side yard using the same detail as we did on our siding. It looks really nice compared to what used to be there, and best of all, it only cost us around $200 in cedar and concrete to do. Once we get the back done, I think it will really change our yard. I'm just trying to figure out the best gate to use so we can still park in our back yard if we need to. Any suggestions?

Dsc 0002-26 Dsc 0001-34 Dsc 0010-10

Lucy Ave. - Details

200709110731I thought it might be nice to show some of the details we have been working on lately. We are starting to install light fixtures, switches and outlets. We have selected all of our light fixtures and a few are shown here. It has been hard to make final decisions even on simple things like can-light trim. We are quite happy with our light fixtures in general and feel like we spent the minimum price for lights that we really like. The only fixture we spent more than $100.00 on was the front exterior light and it is our favorite. Shown to the left are some other finish details (click to enlarge). I promised somebody a long time ago that I would show a photo of our window trim detail. There is actually no trim whatsoever but just the metal sheetrock edging that fits in to a small slit in the window jamb. A small bead of caulk will be placed where the window and metal meet. Then the metal edging will be painted the wall color. Also shown is one of the steel brackets that hold our beams together. These were custom fabricated out of a metal similar to the stairs. This will later be varnished to prevent rust. Jacob

Jacob Jensen Wireless Doorbell

 Images Product 1 ZmWe haven't had a doorbell in a house since we have been married, and honestly with our dog I'm not sure we need one. He assumes it is his duty to bark at anyone who even thinks of approaching our house. If I were in the market for a new doorbell however, I would definitely have my eye on this wireless doorbell designed by Jacob Jensen. It's a classic example of hi tech meets Danish design, and it makes for one of the nicest looking doorbells around. It features 5 different polyphonic bell noises and can be wall mounted or freestanding. The range is 150 meters which should be plenty for just about everyone. The price is a little steep at $150, but good luck finding anything else that looks this good.

Available from Improvee for $150.

Shipping containers deliver

 Albums I207 Modernlover62 Album-2 Album-3 5-9With prefab houses failing to deliver to those who are looking for affordable modern architecture shipping containers have stepped up. People have been talking about it for a while. I used to anxiously read over at fab prefab in the shipping container section waiting for someone to actually build. It seemed like lots of people talked, but very few were actually doing anything. Luckily times are changing. This six pack from Atlanta Georgia has recently gone up and is looking good. Not the best container design I've seen (it lacks a little creativity) but the build price is rumored to be around $75 sq/ft, which is awesome. Head on over to Materialicious to read more about it. Check out a video here.

Eichler Home Tour

 Blog Uploads Image Eichler-Fireplace-PictureFor those of you looking for design inspiration for your modern or midcentury modern abode, I would encourage you to attend the 2007 Eichler Homes Tour to benefit the Hospice by the Bay. This two day event is hosted in Marin County California (which is located just north of San Francisco) and will feature over 20 post-and-beam, midcentury ranch homes built by Joseph Eichler. This annual event for charity is a great opportunity to see a variety of different Eichler floorplans and also get some inspirational ideas for updating or remodeling your modern home. Marin Eichler Tour Dates are as follows: Saturday, Sept 15, 10am - 4pm Sunday, Sept 16, 10am - 4pm

Tickets are priced at $50/one day or $80 for both the Saturday & Sunday Tour. This event has been an overwhelming success the last few years, with attendees coming from around the country (and the Bay Area) for this great charity event. Hopefully you can make a San Francisco vacation out of it and take in some great mid-century modern residential architecture! Tickets for this special event have recently gone on sale and can be purchased online.

Via Marin Modern Real Estate Blog

Exterior Photo Slideshow

Many of you have been asking for more pics, so I put a short slideshow together. I should be uploading one with music and better quality soon. I updated the video, and it's a lot better. Just click on the picture to start playing it. For a reference, the first shots with the maple door are the back of our house. Our house looks almost exactly the same from the front. In the courtyard area was the only place where we put new siding on the old house. As you can see from the pictures, we still need to redo the fascia and soffit.

Enjoy!

Finished

Dsc 0050-4Last week, on Thursday morning, Benchmark was able to finally get the siding finished. It turned out to be a lot more labor intensive than everyone had expected, but it looks just as good as I had hoped. Brady Roofing also came over and finished the cap that goes around the top of the wall. I have been very impressed with them. I called them Tuesday afternoon to see how quick they could get it done, and they had a couple guys on it Wednesday morning. They finished up Thursday just before the appraiser came. I haven't heard the final number of what it appraised for, but I should find out today. I thought I would give the contact info for Brady Roofing since they don't have a website yet.

Brady Roofing Dymon B. Brady 2032 Farm Ridge Rd. Salt Lake City UT 84118 801-487-5151 Fax: 801-487-0796 dbrady@bradyroofing.net

The Siding Continues

Dsc 0003-24
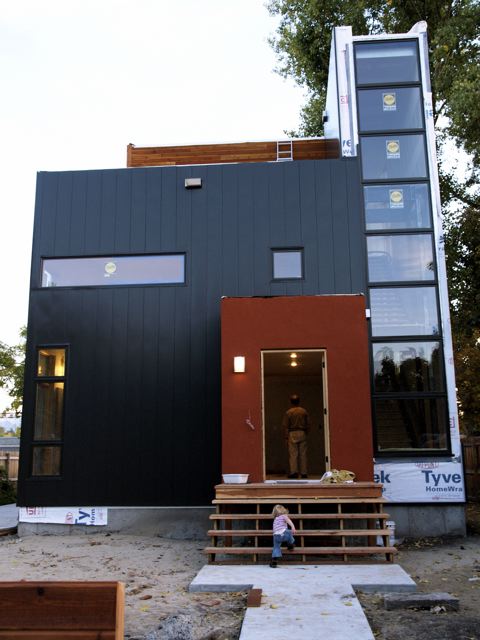
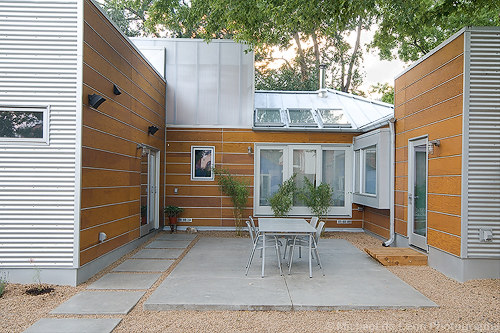
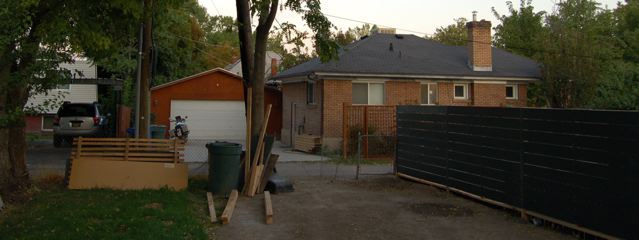
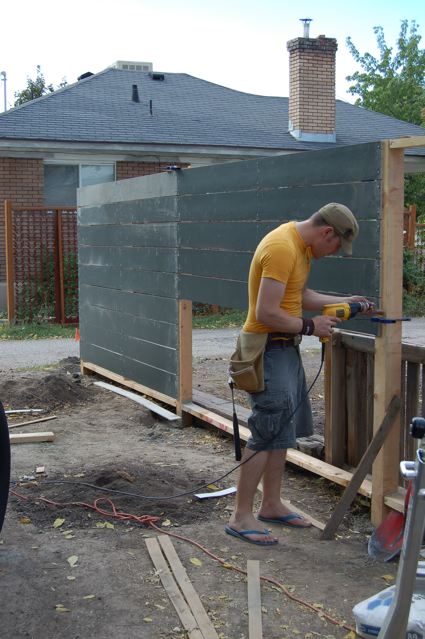
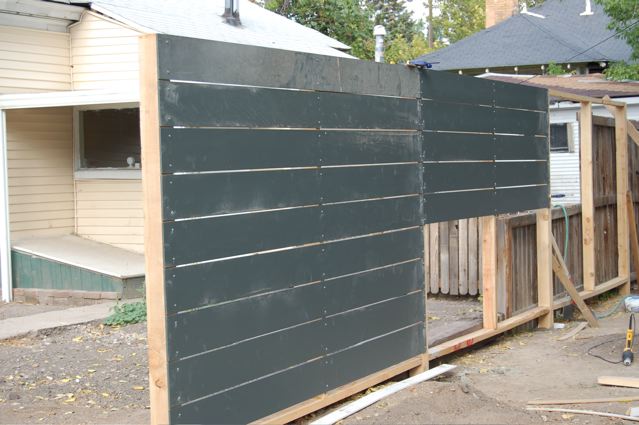
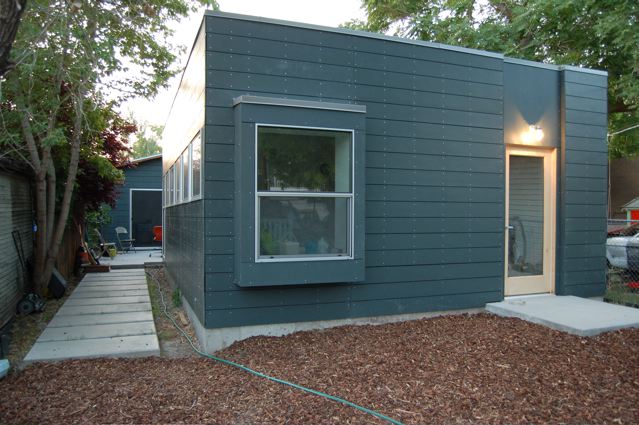
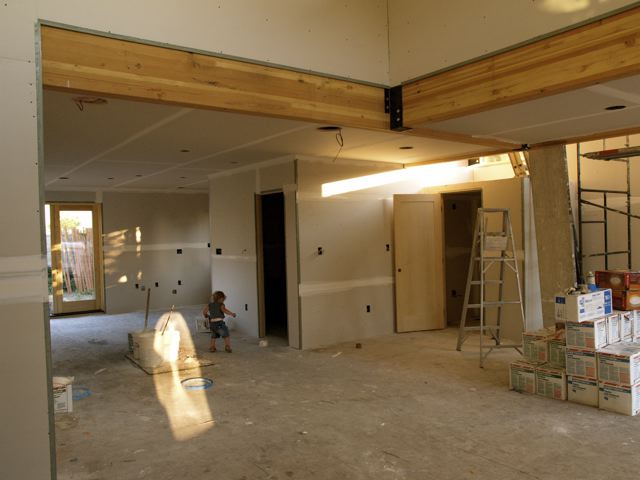
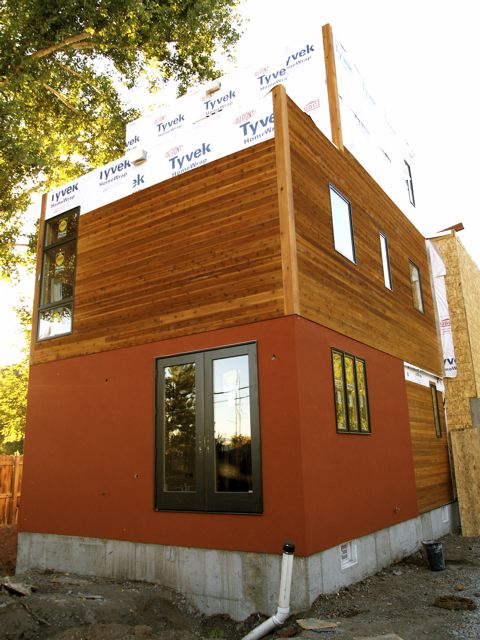
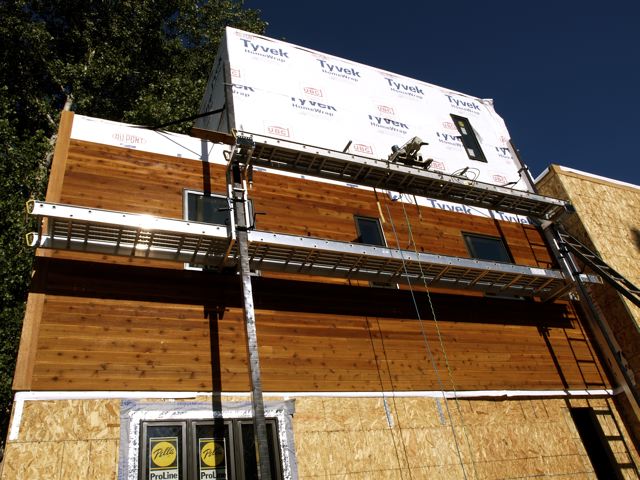
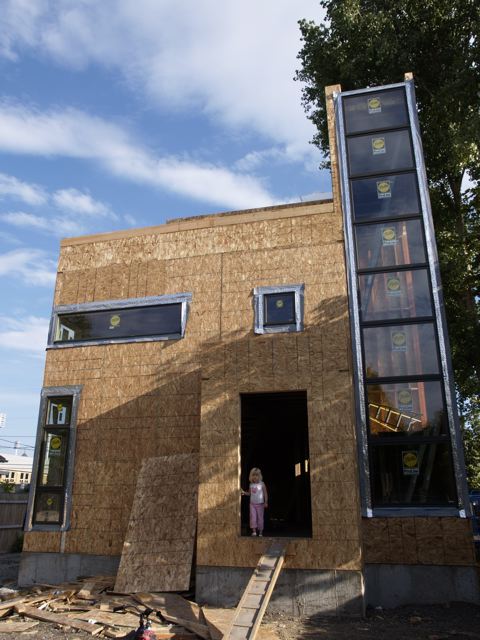
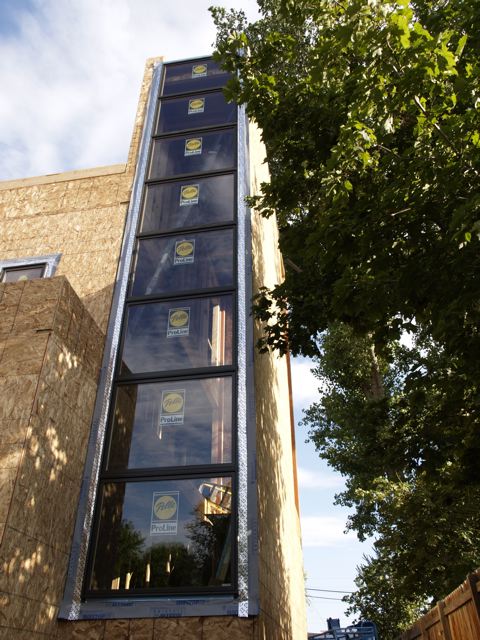
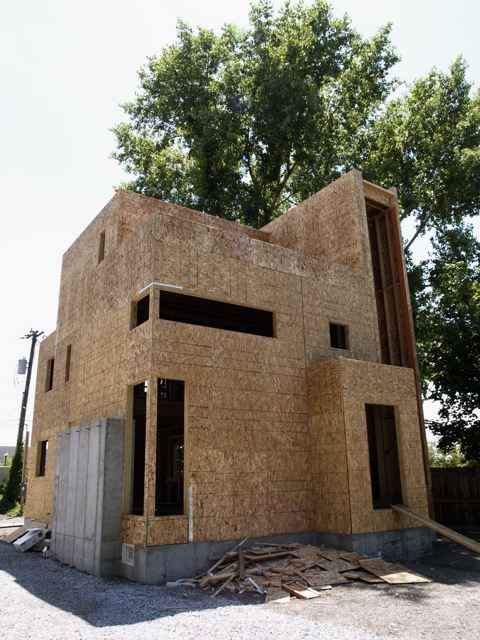
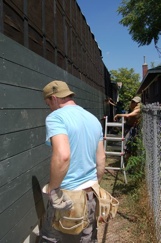
Our rainscreen siding has been a slow and tedious process. So far we are almost 4 days into it, and we are probably about 3/4 of the way done. Thanks to family and friends, we were able to get a bunch of it done this last Friday and Saturday. We hope it will all be done by today, or Tuesday. I have to admit though, that despite all the hard work, it's worth it. The look it gives the house is very distinct, and it really sets the tone for the whole addition. For those who have asked about some of the details, read on for a short explanation of exactly what we are doing and why.

Dsc 0005-26 
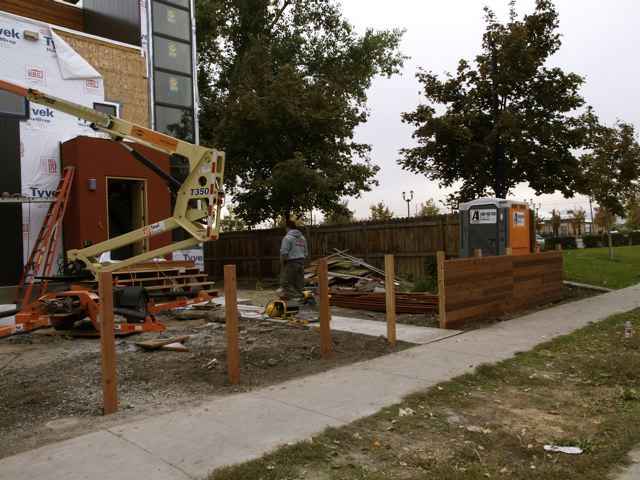
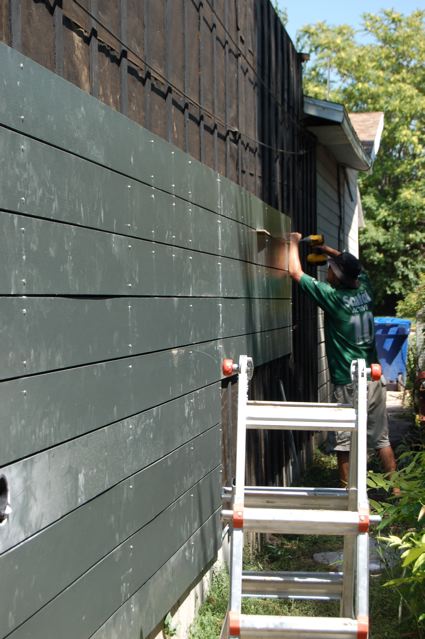
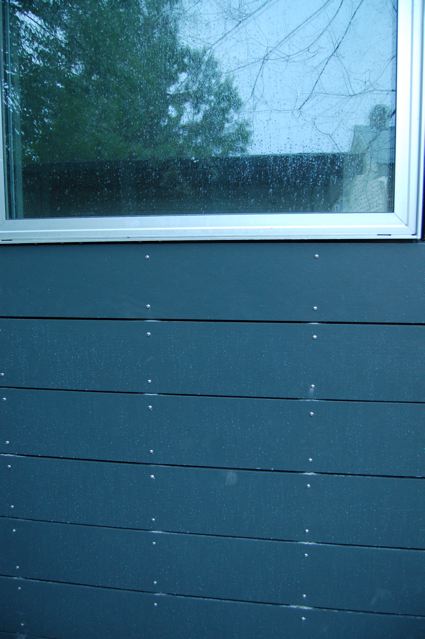
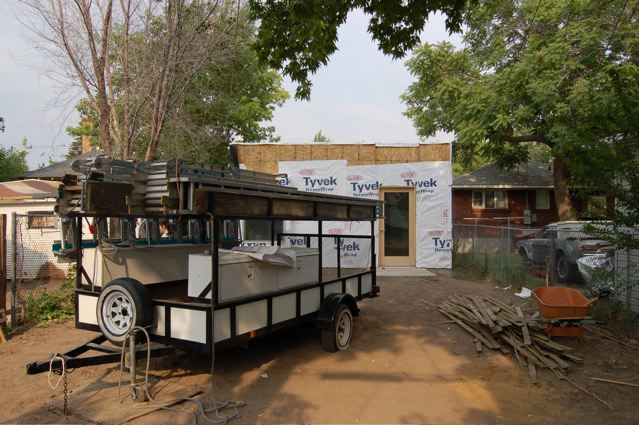
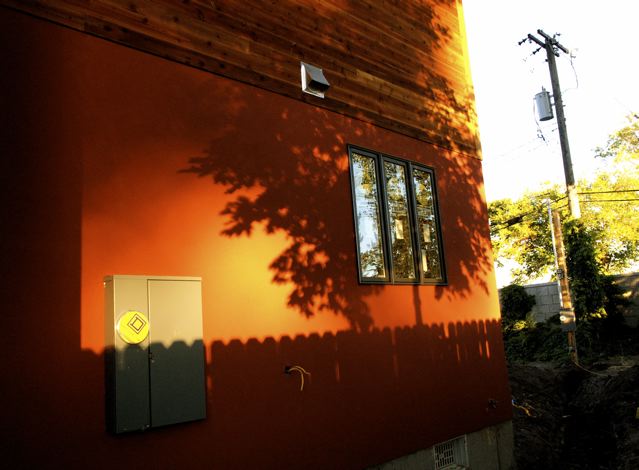
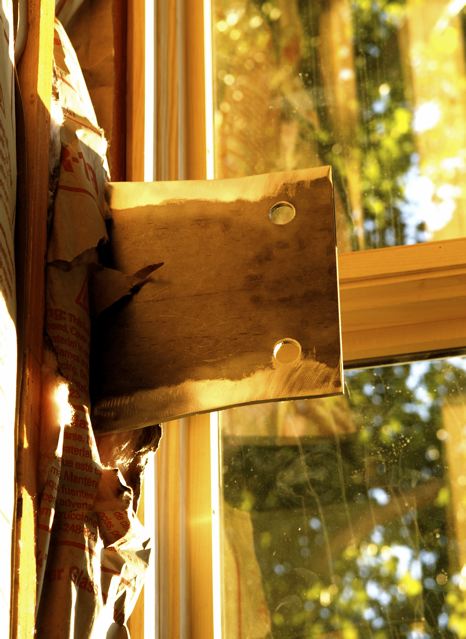
The concept of a rainscreen is not a new one, although it has been utilized much more frequently in modern architecture in recent years. The basic idea is that you start with your exterior surface, and then add your waterproof layer. In our case we wrapped the whole house in Tyvec, and followed that with a layer of 15 pound building paper. We just used the building paper as a layer to black the house out, and not so much for it's waterproofing. To that layer you nail furring strips that will hold your final cladding away from the house. We used 1/2" pressure treated plywood that was ripped into 2/1/2" strips and then painted black. For our project we mounted the furring strip every 16" so we would be screwing into studs. Remember your furring strip layout will determine you screw pattern and your joints. Last you attach your cladding. I have seen some beautiful Ipe rainscreens, but since we were on a budget we went with hardie board. We actually used a 7 1/4" Hardie lap siding mounted with a 1/4" reveal between them. To make our reveals consistent we ripped down some 1/4 masonite to set between the siding as we mounted them. We found the best thing for cutting the Hardie siding was a pair of power sheers. Lastly for screws, we used a #10 pan head self tapping stainless steel screws with a square drive head. They were 1 1/2" in length. We got them online from McFeelys for about $450 for 4,000. Thats a lot of details, but hopefully that answers some questions for some of you. There haven't really been a lot of rainscreen applications that I know of that have been around for 15-20 years, so how it holds up is still to be seen.

More info about rainscreens here and here.

Starting the Rainscreen

Dsc 0014-10After a couple of delays we finally started putting up the siding yesterday. We ended up going with a dark grey called Iron Grey, and I absolutely love it. I was a little worried that it would be too "drama", but I think it's going to work out just fine. Benchmark Renovation is doing the rainscreen with the help of Bob who usually does aluminum siding. Despite the slow start, things are pretty much going the way they should. The pressure is on to get the house finished since the six months for our construction loan is up. We made our last draw to cover the cost of the siding yesterday, and now we have 10 days to refinance everything. That means that we need to get our home appraised again so obviously it needs to be finished.

 Pictures Bob-Athey-1 Bob the siding guy Dsc 0013-16 .

Modern Bungalow

 House Thumbs3 Livingroom2For any locals looking for a house, make sure you check out this one. Owned by Mike of Struck Design this home is a great example of how you can take a traditional Sugarhouse Bungalow and put a modern twist on it. I have always loved homes with exposed brick wall inside like this one. There is just something about them that connects them to their roots. Mike and his wife have done a beautiful job on this home. It is for sale by owner, and the asking price is $286,900 which considering the location is a pretty good price. Check out more pictures and all the details here.

Lucy Ave - The Beginning of the End

 7094467Sheetrock work began a few days ago. This is usually the mid-point in home construction. Since we have very little finish work required, i.e. no window or door trim, we feel like we are well past the mid-point. Sheetrock will wrap up tomorrow and preliminary steel posts for the stairs will be installed later this week. Doors were installed just before sheetrock. Garth found an awesome set of interior doors at a great price, less than $200.00 each! The remainder of the radiant system will be installed and the gypcrete floors will all be done by the end of next.It took some time and negotiation but we finally have a solid game plan for the stairs (thanks to Kenner for the coordination). We are going with a clear varnish on the steel instead of paint. We chose square tubes and stainless steel cable for the railings. Greg with Premier Metal Works is constructing the stairs and rooftop railings. For anyone wondering we chose the Kohler Purist series faucets for the upper floor bathrooms. For the first floor powder room we chose a "Vattern" compact cabinet/sink/faucet combo from Ikea.  7094471  7094463

The Siding Begins

Dsc 0004-14The siding installation on our house is going to be quite a bit different than what most people in the area are used to doing. Because of that we have had a hard time getting anyone lined up to do it. I had several people come over to quote the job, and then never heard from them again. Luckily we were able to get Benchmark Renovation back over here as they have experience with a rainscreen siding installation. The siding was supposed to be here by now, but there were some problems with the shipment. Hopefully it will get here soon. More details coming soon. Dsc 0002-21

Lucy Ave - Stucco & Steel

 7034451 2-1After some furious decision making we came up with a stucco color that we are very happy with. With a lot of help from Stephanie & Kenner we all decided that "Red Oxide" would be the color of choice. We had to deviate from the standard catalog colors and choose a color from regular paint chips. We are glad we didn't settle for mediocrity on this one. The stucco catalogs seem to only have varying versions of beige. We also decided on a "fine" texture which was executed well in our opinion. We also have some more stair hardware installed and drywall is well underway. Also If anyone out there knows of any good kitchen and bath faucets please share. -jacob

 7034429 2  7034442 2

Lucy Ave - Steel, Copper and Cedar

 6204310It's been a long time since the last update and a lot has happened. I have been working furiously trying to complete the rough electrical for an inspection today. I have also been preparing the cedar siding for installation by dipping it in deck stain. We are using a product that is guaranteed to last five years. We should get a few years on top of that because we are dipping it and therefore covering all four sides. This is all to prevent me having to get on a ladder in a few years and reseal it. Premier Metal Works came and installed some preliminary stair parts in the crawl space. Dave and his company, Inline Plumbing, have completed the rough plumbing as well. Everything seems to be on target for a September move in!

-Jacob  6204314  6204309

Lucy Ave - Big Windows

 6084297 2With big walls come big windows. Today the stair windows were installed. We have been anxious to see these get done. They started installing windows on monday but the rain caused a serious delay. These are a very dramatic element of the design and it's exciting to see them come to life. The stair windows span the entire height of the building and provide beautiful light to the whole house. We decided to go with Pella Pro-Line windows. Garth recommended them and he worked with the sales rep. to get us a good price. They are efficient and beautiful windows and a large portion of our budget was spent on them. We originally thought we could use a salvaged aluminum window but found that the supply was not as plentiful as we had originally been told. These are also a much more energy efficient window than aluminum. We would have preferred the look of aluminum but Pella's color options were quite limited. The roofing material showed up today and should be installed on monday.  6084295

 6054284-1

Lucy Ave - Framing Complete

 6024235Sorry for the delay, this has been a very busy week. Framing wrapped up a last week. They were able to get it all done on schedule as they promised. The only mistake they made was to put the master bath window in the wrong spot. They will come soon to correct it. The shape of the home is just as we expected and there have been no major surprises going from two dimensional to three. We are very happy with Kenner and Stephanie's design and we have no regrets. My father-in-law and my brother-in-law and I managed to get most of the wire pulled and all of the boxes and can lights installed. I just need to finish wiring the third floor. The plumbers came last week and have already completed almost all of the rough plumbing. This will be a big one, we have window installation, some exterior material, more plumbing and electrical work all taking place.  6024236  6024237