Mid-Century Modern in Colorado

200611201127While I am sure there are lots of great mid-century homes for sale in Colorado, this one is close to my heart. That's because it belongs to my Grandparents. I spent many enjoyable summers in this home learning to appreciate the classic contemporary design. The home was designed by an architect friend of there's and is a classic. They are actually trying to sell it now, as it is too big for their needs. The thing that kills me is they have been having a hard time selling it, and they are only asking $199,000 for it! Man where were deals like that in Utah when I was looking to buy a home. Check out the virtual tour, and see what great design I had to grow up with. For sale here. Comments? Post them here in our forums.

It’s official, almost

Dsc 0002-7Let me just say, yesterday was a good day. The stars aligned over our little 700 square foot house, and the results were great. Not only did we finally get our drawings completed and stamped by the architect and engineer, we were also able to get out building permit! It was the culmination of an entire summers work coming together in one $1,200 dollar bang. That is the cost of a building permit on a addition valued at $48,000. Note to self, additions are not affordable. The thing that kills me is how much money you have to spend before you can even get your loan. You've got architectural fees which are a couple grand, engineer fees, around a grand, building permit, at least a grand, inspection is a couple hundred. You could easily spend $5,000 out of pocket before the bank will even consider a loan. Speaking of loans, before I can get ours, I need to bid out the entire project. Since I will be acting as general contractor, I am looking for some good subs. Anyone know of any local? In particular I am looking for a good concrete guy, roofer, drywall and roofer. Any suggestions will be welcome. As soon as I can get all my written bids together, I can get my loan, and break ground. It looks like we might even get it all done this year if we hurry.

Comments? Post them here in the forums.

Hotel as Home

 Images Covers480 1568986033-1200611060910Hotel as home is a new book by architect Gary Chang. Raised in Hong Kong, and frequently traveling abroad, Gary knows Hotels. In this unique work Mr Chang shares his favorite Hotels, along with all the fine details that only an architect would pick up. He has been meticulously logging every great hotel room he has stayed in since the late 90's with photos, and drawings of the rooms floor plan. Included in each entry is the exact room he stayed in, as well as the price paid for the room. This book is a must have for anyone who loves hotels. My favorites were Hotel Le Corbusier, with a daily rate of $92, and the beautiful Hotel Zurichberg at $166 a night. Great pictures, great price. Published by Princeton Architectural Press.

Available from Amazon for $19

Comments? Post them here in our forums.

Bathroom Window

Dsc 0011-2Dsc 0020-4Just when you thought I was out of walls to knock down. I finally got around to installing our Milgard window in our bathroom. It (like many of our projects) has been sitting in our living room for almost a month now. I didn't really plan on making hole quite that big, but some of the old sheathing was water damaged from the poor installation of the previous window. I ended up just ripping it all out, framing in a new wall and installing the new window. Install was a breeze, and it looks really nice. The window was a special order from Homedepot. It's a Milgard thermally broken aluminum awning window. We went with the narrow reed for some tasteful privacy. It ended up running us close to $800.

Comments? Post them here in the forums.

MoCo Loco Interview: Upe Flueckiger

 Archives Upe Flueckiger 21St StreetMoCo Loco recently interviewed Architect Upe Flueckiger about his Lubbock, Texas home that was built for $51 a square foot. It is interesting to read about his inspirations and point of view regarding the design of his home. While Upe tries to avoid being grouped into the whole modernist category, its obvious that his style coincides closely with other modern homes. While he doesn't go too closely into detail about the methods he used to reach the $51 a square foot price point, it is interesting to note that it is far below any of the other modern prefab homes that claimed to be the answer to affordable modern housing. Read the interview here.

Comments? Post them here.

 Archives Upe Flueckiger House Detail  Archives Upe Flueckiger 21St Plan-1

Anna Castelli Ferrieri Dies

 Images 2006 06 28 Obituaries 28Ferrieri.190Via the New York Times: "Anna Castelli Ferrieri, a pioneering architect associated with the postwar period of Italian modern design, known for its embrace of technological innovation and audacious style, died on Thursday at her home in Milan. She was 87." Thanks to Michael for the heads up. She will be missed.

H Space Design Build

H Space BungalowThis is a quick shout out for one of the local boys that is doing some awesome work. I recently had the pleasure to talk with Scott from H Space Design build. I actually stumbled across his website googling for residential concrete, salt lake city, or some random search like that. From my brief phone call, I was very impressed with some of the things that they are doing. Their website shows a very sweet remodel they just did in a swanking, yet charming neighborhood near down town salt lake. While it is not exactly affordable by any stretch of the word, it is a great example of the work they do. The good news for us little guys, is that Scott and H Space are doing a number of nice modern additions in much, much more affordable neighborhoods. Hopefully I can get together with them and get the good news of affordable modern housing out. Definitely more to come on this one.

H Space designs website is still a work in progress (like my house) but check it out anyway. It has a link to an MLS listing with lots of sweet pics. I especially love the Duravit Happy D tub.

*****UPDATE 2/15/11

I've update the photo's on this old post because the old photo's were just showing broken links.  The photo's shown here are from the Brach Design Website.  Dave Brach was working for H Space at the time these were designed. H Space is no longer in business.

3D Renderings

Dsc 0008 5 2I promised last week that I would post some of the first 3D renderings that we had done. What you see here is almost a combination of the two floor plans that I posted last week. In the 3D renderings the existing structure is left in 2D and the addition is 3D. Having ripped out the wall between the old living room and bedroom further solidified the idea that the addition should have two bedrooms. Instead of trying to minimize the hall space, we decided to maximize its efficiency. Starting about 10 feet into our existing house (next to the bathroom) to the very back of the addition will be built in storage. That should make the smallness of the floorplan a lot more livable. The exterior will be a Hardipanel rainscreen. The windows have changed quite a bit from these renderings, but the rest is basically the same. Lots more pics, and a good floorplan after the jump. Dsc 0008 2 2

Dsc 0008 6 2 Dsc 0008 3 2

Dsc 0008 4 3 2

Dsc 0008 4 2

House plans

200606051611I promised earlier in the week I would show you some of the first house plans our architect designed for us. Things have changed quite a bit since these first set of plans, but it is interesting to see how things evolved. The idea was to add two bedrooms to the existing structure, but have them separated by a courtyard. In both of the plans shown above the wall between our existing bedroom and the living room remains intact. If you have been following the story, you already know I ripped that out last fall. What we actually ended up with is more of a hybrid of these two designs. The real tricky part has been cutting down on hallway space to maximize livable space. Next week I will post one of our first 3D renderings which is much closer to our current design.

Designing an addition

200606051539-1
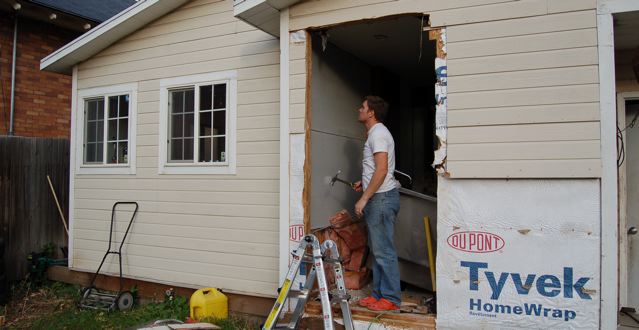
I have hinted before about the fact that since buying our home, we have always planned on adding some square footage. Since the day we moved in we started brainstorming about how we would like to enlarge and improve the existing space. Originally we had ideas of building up, which would increase our livable space, without sacrificing any space from our small lot. Unfortunately, chopping off the top of our house and going up a level was not too feasible when it comes to affordability and livability during construction. That left us one option, an addition in the back yard. Before I go any farther, let me paint for you a mental picture of our lot.

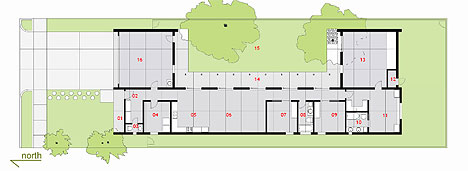
It is 31 feet wide, and about 145 feet deep. Thats about 4,791 square feet, or .11 acres. We have one of the smallest lots on the block, but luckily we have alley access in the back, which makes it a pretty usable size. Our house is around 24 feet wide, which leaves about 4 feet on one side and 3 feet on the other. That means we are pretty close to our neighbors. Our neighbors to the north have a six foot wood fence, so visually they are not much of a problem. The south side is a different story. On that side there is a 4 foot chain link fence between us and two junk cars, half dismantled and sitting on blocks. Just behind the cars is a mammoth two car garage, which is full of everything but running cars. In other words, not the best view.

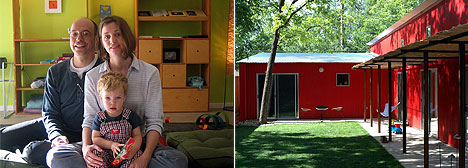
About the same time we were beginning to plan our house, I came across a great thread over at fabprefab which was originally named "less than 1,000 square feet". Sixteen pages later, that thread became the courtHOUSE thread, which became the inspiration for Mark Meyer's (aka eamesdaedelus) courtHOUSE. Make sure you check out Marks Livemodern page for some great renderings of this beautiful project that never came into realization. What I took away from those 16 pages was a notion that not only was it very possible to have a smaller home (something I already believed) but one of the best ways to maximize the space is by creating an outdoor room by making a courtyard. I have lived in Brasil where couryards are much more common than they are here in the states, and I loved the intimate outdoor spaces they create. The idea of a courtyard also solved the problem of our rather close neighbors on both sides. We would be able to have our privacy out doors and expand our floor plan.

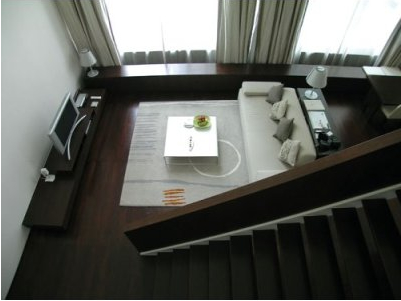
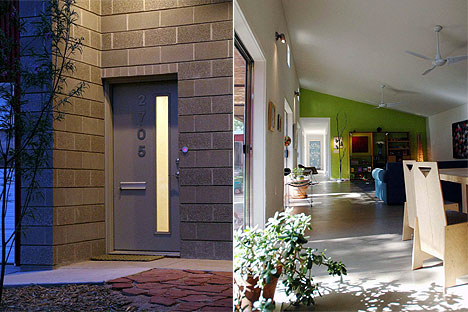
I was also reading a book called Mini house style. In the book it had the architect of each project list the top five things that were important to making a small home work. Several things that I took away from that were #1 built in storage, #2 open, flexible floor plan, #3 long line of sight to increase the feeling of space.

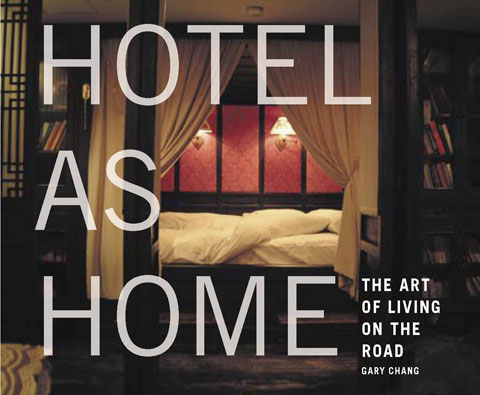
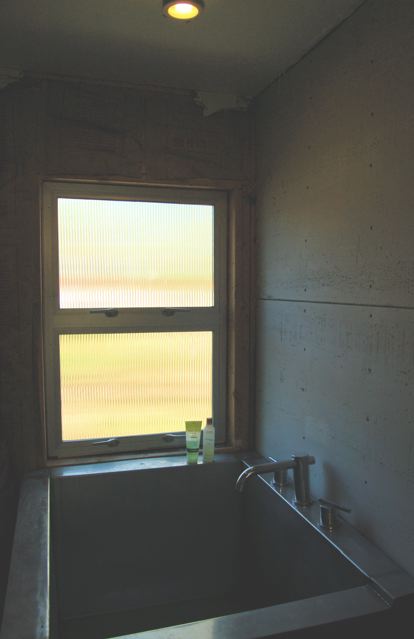
One other thing that was on our laundry list of wants, was a japanese style bathroom. We had recently visited a local spa called The Kura Door, which had some beautiful Ofuro tubs. After that we became semi obsessed with the whole japanese bath experience. If you have know idea what I am talking about, don't worry, I'll get into it more later. If you are looking to do some reading, "The Japanese Bath", is a great book, as well as the more light hearted "How to take a Japanese bath".

I am lucky to have a friend Seth Striefel, who is an interior designer turned architect. At the time we were looking for our house, he was trying to find the same thing, either a lot to build on, or a cheap house to remodel. He has a great eye for design, and was kind enough to agree to help us design our house. We got together with him one day, and told him all our ideas that we had for our house. He had some great ideas, and drew up some floor plans, which I will post about later this week. Stay tuned.

Demo continues

Dsc 0173If you have been following the story of our house, you know what a mess I got myself into. Yesterday I explained how I started the demo for our radiant heat. Before I continue, I wanted to explain a little just how I planned on doing the radiant so you don't think I was totally crazy. Where access from beneath is possible the most efficient way to add radiant heat to a wood subfloor is to run the tubing between the floor joists and staple it up with metal heat transfer plates. This is a fairly painless experience for those with full basements. My house had a 10' by 10' basement with 6 foot ceilings, about another 50% was crawl space ranging between 1' and 3' of clearance from floor joist to dirt. The remaining 40% above which I was currently doing the demo work mentioned previously had almost no clearance from below, making a staple up install impossible. There are plenty of above subfloor systems out there for the application I was planning on doing in the front of the house, most of which were quite costly. I opted for the DIY approach. It consists of ripping 9" wide strips of plywood and attaching those to the subfloor 1" apart from eachother. This creates a groove which you can safely lay your tubing and heat transfer plates before putting your finished floor in. The obvious downside to this is the extra thickness of the floor. Because I didn't want to have 3" thick floors and 5' door ways I decided I had to demo all the way down to the floor joists and level them out, install a new subfloor, the layer of radiant, and then the finished floor.

Taking out all the old floor meant reducing our 750 square foot home to less than 300 square feet of usable space. We managed to put most of the furniture in the kitchen, including our bed. While ripping out the floor I found old newspapers from the 30's and 60's. I kept some of them, but the majority went to the trash. After taking all the flooring out, I noticed that the wall between our bedroom and the living room was just floating in mid air. We had rough plans for our addition, and knew that we wanted to open up the front of our house as much as possible. After convincing myself that the house would indeed remain standing without the wall, I went to work on ripping it out. The results were dramatic. Our cramped little living room and bedroom were now one big open room. If only it had a floor.

If you actually made it this far into the story congratulations. I'll save you the boring details about the sub floor. The short story is that I very carefully cut joists to sit on top of the old ones, bringing all the floor to the same level. Everything was carefully braced, and eventually a real live subfloor was installed. The whole process from exposed floor joists to subfloor probably took just under two weeks. All praises at this point should go to my extremely patient and beautiful wife, who somehow made sleeping in the kitchen among piles of furniture and boxes seem like a sane thing to do.

The pictures speak for themselves Dsc 0172 Looking from our living room through the door to our bedroom. Dsc 0176 Our bedroom floor. Dsc 0177 Another shot of our bedroom floor, showing the old ducting below. Dsc 0179 The huge pile of wood in front of our house. It got bigger. Dsc 0181 The scary bridge from our front door to our kitchen and bathroom. Dsc 0186 Did I mention how beautiful and patient my wife is? Dsc 0189 The floating wall between our living room and bedroom. Dsc 0195 Demo of the wall. Dsc 0197 One big room. Cross bracing floor joist before leveling. Dsc 0201 Finally a subfloor in the bedroom half. This is well over a week into the project. Dsc 0205 Looking from the bedroom to the living room. Floor leveled and partially insulated prior to subfloor install. Dsc 0206 Living room. Dsc 0208 We officially have a floor in all of our house! Dsc 0213 Studio living never felt so nice. Dsc 0209 Next I have to learn to wire. Dsc 0212

.

Our house . . Demo

Dsc 0151We had always planned on tearing out our carpet in our house. The short neutral grey/brown pile just wasn't doing it for us. We found our excuse to finally get rid of it last fall. After our first colder fall day I started thinking about getting our furnace ready for the winter. I pulled up a grate to see how clean our ducts were, they were a complete terror! Each one had at least a couple inches of dust, dirt and grime. Just the thought of all that filth blowing around was enough to make me shudder. Since moving in we had wanted to do an addition, and heat it all with radiant heat. I figured this was the perfect time to switch out systems, and save us from having to turn on our old heater. Half of our house had decent access to the floor from underneath, which presumably would make installing radiant easy on that section. Unfortunately we couldn't access the front half of our house from underneath, so we would have to lay the tubing on top of the floor. More details on that later.The first step...

We knew we had to rip out all the carpet. It was a quick job that went easy enough, but uncovered some peculiar findings. Under the carpet we could tell that there were several layers of subfloor. I wasn't quite sure why, but I hoped to be able to take it down to the original subfloor, and save myself a couple inches of floor height. It seemed like for each layer of subfloor I ripped out, I found another . . . at least in some places. As I peeled the layers back it quickly became apparent why there were so many. The original subfloor, which was a very abused tongue and groove pine, was extremely uneven. The two farthest corners in the room were almost a full 3 inches lower than the high spot in the middle. After all that destruction, I now had to figure out a better solution than the built up layers of patchwork plywood. My simple carpet removal prior to the radiant install had suddenly turned into a big project.

As a quick note,I realize that this is about projects in the past. Things are starting to happen quickly in my house now, so I plan on getting caught up, and then giving weekly in depth updates as to what we are up too.

Grassrootsmodern Design?

ShopI have been into the design scene for just a little over two years now, and blogging for just under a year, but I must admit it has had a change on me. Seeing all those people like Furni, MAKR, Gleason Woodworking, etc start out with just a dream and be able to make something of their passions has lead me to believe I could actually have a job I enjoy. Unfortunately blogging doesn't pay the bills, so I had to look for an alternative creative outlet. My real passion lies in furniture design. I considered seriously for a while going to ID school, but the reality is I want to work for myself, so a degree is probably not too important. Inspired by my friend and artist Chris Gleason, I decided woodworking would be satisfying and potentially profitable. So I threw caution to the wind a couple months ago, and rented a room a few blocks from my house, and bought a couple thousand dollars of tools and went to work. This morning I am going to install my first job. Its a countertop height desk in my architects house (another great example of affordable modern housing, more on that later). I'll be back with pictures later today or possibly tomorrow.

Our house, making the modern home affordable

before copyThis is the first in a long series of posts that I will be doing over the next couple of months. One of the biggest obstacles to us aspiring modernists is finding an affordable modern home. In fact, it has become a huge niche market with tons of people trying to cash in on. Prefab housing was one of the first genuine attempts to make affordable modern homes available to the masses, but unfortunately it has come up short in filling the needs of the common man. I hope to show that with a little creative thinking, and a lot of hard work, anyone can have an affordable modern home. For those that are interested in a somewhat lengthy, but thorough discussion of how we are making it happen, read on...

Ok, let me set the stage for you, tell me if it sounds familiar to you. My wife and I had been married for about two years, and had been living in various apartments around the city, some better than others. We were really tired of feeling like we were just throwing our money away, and wanted to live in a modern contemporary home. We spent quite some time researching building costs, figuring that the best way to have a modern home was just to build one. We live in Salt Lake City, Ut, and building costs for the frugal can usually be had around $100 a square foot. We thought that would be perfect, 1200 square foot home on a thirty thousand dollar lot, and we would hit our budget of $150 thousand. Sounds good on paper, unfortunately it totally doesn't work. Problem #1, there are no lots for sale anywhere we would want to live, and certainly not for $30 thousand. We really didn't want to compromise on location, so after almost 3 months of looking for a lot, we gave up on the plan of building in the downtown area. That left two options, either buy a house that already fits our style and budget, or find something really cheap that we could put a lot of money into. Of course finding something that fits our style and budget was never going to happen. All the cool houses go for 1/2 million or more, very frustrating. So we set out trying to find a house that was cheap and in a good location. Not an easy task, but one that at least proved possible.

Stay tuned for the next update in this series on making the modern home affordable. If there are any details you want to know, just ask.

Making the un-modern modern

DcelevationA lot of you have forgotten about the forums. They are a great place to write in and get some great advice. I think it's really the community effort that makes affordable modernism possible. We recently had a plea for help in making a pretty un-modern home look a little better. Check out the responses, and see if you can't lend a helping hand. Here's a preview.

domanicapital: Hello all. I recently discovered this website and think its great. I'm building a house (pictured above) and need to decide on an exterior. Unfortunately, the home style is not very modern, but I'm wondering if there is a way, despite the traditional look, to jazz up the exterior in a modern style.? The interior will be easy because it has a nice open floor plan,.

Dallas Ward: Hmm, you could get rid of shutters and reduce your trim. Glass and aluminum garage doors could be cool. Metal roofing if yours is in need of some replacement? Do something custom and interesting with your attic vents. Find an interesting color and do a monochrome look.

Any other ideas? Post them in the forums.

5280mod

 User Images 1144678336 Info@5280Mod.Com User Images 1144206127 Info@5280Mod.ComMy wife and I bought our home less than a year ago. While we were looking for something we were absolutely disgusted with the lack of decent affordable modern housing. Basically it doesn't exist. We opted to buy a tiny home in a good neighborhood, and do a modern addition to it (more on that soon, plans are almost done). For those of you living in the Denver area, check out 5280mod.com Colorado based realtor focusing on modern housing. While everything might not be affordable, at least they will know where you are coming from.The pics to the left are of a ufo home (I remember one of those in dwell) for $129, and another mod influenced MCM home for $210.

Also check out Shannon's blog on livemodern.

Anyone need some nice mahogany?

MahoganyGRM reader Ann of Seattle wrote in asking:

Do you know of any interest in second-hand house trimmings? I'm about to remodel a 60's house, would love for all those mahogany doors, frames, base boards etc. to go to a good home, not sure how to seek out a market ... I'm in Seattle, a "hotbed" of re-use and reasonably fashion-forward, so there must be someone who wants my mahogany :-) It's a matter of finding the community connections...

I am sure there are some great places, I would give The Re-Store a call, they might be able to help you, or at least point you in the right direction. Besides that look online or in your yellow pages for architectural salvage. If anyone in the is interested, post in the comments, or contact us and we will forward your info to Ann.