Storage Resolution: Part 1

Dsc 0065-2It's 2008 and new years resolutions abound. Ours is to finally get some decent storage built into our 1,300 square foot house, and we're well on our way. We spent the weekend assembling this Ikea GORM shelving and filling it up with tools and other random stuff that had been hanging out in our hallway upstairs. We managed to fit an amazing amount of stuff in our small 6' x 10' mechanical room. We installed about 8 linear feet of shelving for just over $120. Best of all, we were able to get our hallway cleaned out so that we could start installing the cabinetry that we had planned for it....8 Linear feet of GORM shelving from Ikea for $120.

Dsc 0066-4 Dsc 0068-3

KNAPPA Pendant

Dsc 0012-13We have been doing a lot of shopping at Ikea lately thanks to our 20% cash back sofa credit. We bought two KNAPPA pendant lights for our front room, and last night I put one together and hung it. It comes with a plug end, but I cut the cord and hard wired it into the ceiling. I have to say that at $25 the KNAPPA looks 10 times more expensive than it really is. It totally transformed the look of the room, although admittedly the bare bulb hanging from the ceiling wasn't doing much for the ambiance. Not only does it look great, but it was fun to put together too. I think it actually gives you a little bit more appreciation for the light having put it together yourself. Available from Ikea for $25.

Kitchen is almost done!

Dsc 0001-39Over the past couple weeks we have been slowly collecting all the pieces to do the next major section of cabinetry in our kitchen, and it's finally done. The new part is the section with the MUSMIG oven and Bosch cooktop. Like the rest of the kitchen we used the NUMERAR countertop and SORBO cabinets. After getting it all put in we quickly found out that we would want a backsplash, so we got two IMPERATIV stainless steel wall panels from Ikea for $18 each. They were very easy install, and I think they look great. We are thinking about doing a chalk board section just to the right to finish of the length of the counter.As far as the quality of Ikea kitchen cabinets go, I have been really impressed. The actual boxes themselves aren't anything special, but all the hardware is pretty high end Blum self closing. The quality of the drawer fronts is quite good as well, and it is all very easy to install. I'd definitely do it again in another house.

Dsc 0015-14

A sofa…. Finally

Dsc 0009-12So we finally went ahead and bought a sofa. It has been over two years since we got rid of our old couch in anticipation of purchasing a new one. We got the KRAMFORS from Ikea as part of their 20% back sofa sale. 20% back isn't quite the same as 20% off, but we figured we would be spending more money at Ikea soon anyway, so it's pretty close. For those of you who aren't quick with the math, we got a $279 gift card for buying our little sectional, which makes it a great deal for only $1,119. The build quality is quite good, but as with all Ikea goods there was a little bit of DIY to get it assembled. The chaise and the love seat connect together with a clamp on the bottom to make them so they don't slide apart when you sit on them. The seat is quite deep and it's almost a little awkward to sit on without a cushion behind you. That said, if you are not trying to sit all proper, and snuggle up on it during a movie it is quite comfortable. Available from Ikea for $1,119. Dsc 0005-32

Ikea MUSMIG Oven

200711071320I mentioned a couple of days ago that we were getting ready to finish our kitchen. For our stovetop we ordered the Bosch, and originally we were going to get a Bosch oven too. That is, until we saw the price tag. The Bosch oven we wanted was close to $1400, which was way out of our budget. So we did what any reasonable person would do, we went to Ikea. The Ikea MUSMIG oven is a steal at only $700. It may not have all the bells and whistles of the Bosch, but it is a good solid oven, and it looks pretty good. I also figured it should fit perfect in an Ikea cabinet, since it is made for Ikea. We went ahead and ordered it and all the cabinetry we needed for less than the $1400 price tag of the Bosch oven.Available from Ikea for $700.

Bosch Gas Cooktop

 Product 825225 825225846413Even though we have done a lot of work in our kitchen, it's still not complete yet. We managed to relocate the sink and rip out most of the old cabinetry and put in new Ikea cabinetry on the opposite wall. We have been waiting to finish the last leg of cabinetry and ditch our old electric stove for a gas cooktop and built in oven. In looking for a good affordable yet stylish gas stovetop we were delighted to find the Bosch line at Lowes. Not only does Bosch make some of the more stylish stovetops out there, but the prices were way lower than any others. We went ahead and got this 30" stovetop (the PCK755UC) with a continuos grate for just under $600. We went back and forth on whether or not we should get the 30" or the 36". We justified that with the layout of t he burners on this one that the 30" would be fine, and it is if you only have two pots on the stove top. Any more than that and it's pretty crowded. I think next time around we will throw down the extra $200 to get a 36". Besides the sometimes cramped space we absolutely love our stovetop. I can't tell you how much nicer it is to cook on gas compared to electric. It makes a huge difference.

Available at Lowes for $598.

$60 Japanese Maple

Dsc 0001-35By now, you should all know that I am somewhat of a Craigslist junkie. I have to admit it is mostly out of necessity, as that is the only way we can afford to landscape and furnish our house affordably. I was lucky enough to come across this Japanese Maple a while ago for only $60. That's a great deal, and we had been wanting a japanese maple for a while now so I couldn't resist. The only catch was, I had to go and dig it up. Luckily for me, it had only been planted the year before, and most of the roots hadn't strayed far from the original root ball. We have had it in the ground for about a month now, and I am happy to say it likes it's new home. So do we.

Fencing

Dsc 0005 2-4When we ordered our siding we had to order a whole pallet because we were having it painted at the factory. We knew it was going to be more than we needed, and figured we could find something useful for the excess. This weekend we put it to good use. We put up around 24' of fencing on our side yard using the same detail as we did on our siding. It looks really nice compared to what used to be there, and best of all, it only cost us around $200 in cedar and concrete to do. Once we get the back done, I think it will really change our yard. I'm just trying to figure out the best gate to use so we can still park in our back yard if we need to. Any suggestions?

Dsc 0002-26 Dsc 0001-34 Dsc 0010-10

Free is the best kind of affordable

Dsc 0020-13When it comes to affordable modern furniture, there is no better price than free. I've been lucky enough to come across some good free stuff lately. These Danish modern chairs I found sitting next to a dumpster and quickly snatched up. It's funny because just a couple of weeks before I saw almost the exact same chair on apartment therapy listed for $200. The LAKT tables were another craigslist freebie. Some of you might remember that we got half of our back yard sod free from craigslist a month or so ago. We love craigslist and frequently watch the free section. Unfortunately "free" is the only kind of furniture we can afford right now.

Dsc 0027-7

Storytime Rocker

Dsc 0002-25WIth the completion of our addition we have completely exhausted any available funds, and have found ourselves without any furniture. Luckily the one room we did manage to get furnished was our nursery. I previously featured our Ariel crib which we absolutely love, and the other favorite is our Storytime Rocker. We ended up getting an ecru microsuede with light ash legs. Just like the crib, the build quality of the rocker is top notch. It has been getting plenty of use, and it still looks good as new. While it may be hard to fork out that much money (retail is $800) it is worth it in the end. If you are not too picky on color, Sparkability has several colors on sale for $560, which is a heafty discount.Other choices for more affordable modern rockers; the classic Eames shell rocker for $349, or the LILLBERG rocking chair from Ikea for $139.

Our House - Project Recap

200708280707 We officially closed on our new mortgage last week, and our loan funded yesterday. Even though there is still plenty to do around the house, I guess that sort of marks the project as "completed". I thought I would give a brief recap of costs for those of you who are curious to know how we ended up. As you remember if you have been following from the beginning, we bought our home just over two years for right around $106,000. It was a good deal for a 700 square foot home on .11 acres of land. We almost immediately started tearing it apart. In the first year we ripped half the floor out right down to the floor joists, ripped out a big wall and dropped ceiling, and ripped out the old forced air furnace and installed radiant heating. We easily spent over $10,000 that first year out of pocket. 
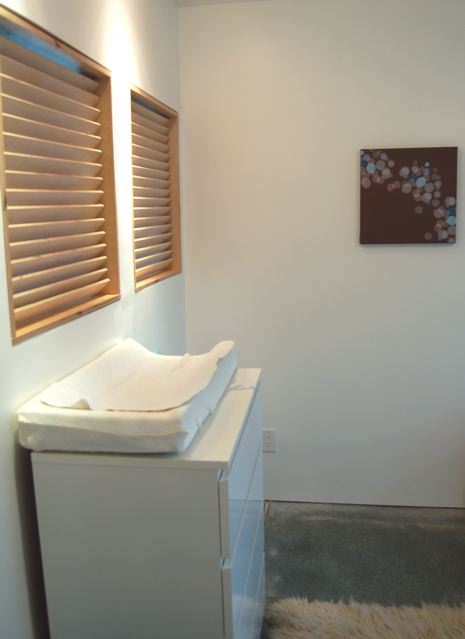
Over the next 6 months we started planning our addition, and doing as much work out of pocket as we could in preparation. Prior to the addition we tore our whole bathroom apart and moved the location of the shower, bathtub, and sink and toilet. Rearranged the bathroom walls, built a vanity with concrete countertop, installed a wall hung toilet, designed built and installed a custom ofuro tub. We also ripped out more walls in the front of the house including one that was load bearing. Moved our electrical panel to a different wall and wired in a updated panel. All these improvement probably cost us anywhere from $5,000 - $10,000. Sorry I don't have better numbers, but it was all out of pocket and we tried not to think about how much money were were dumping into a house that still didn't look all that great.

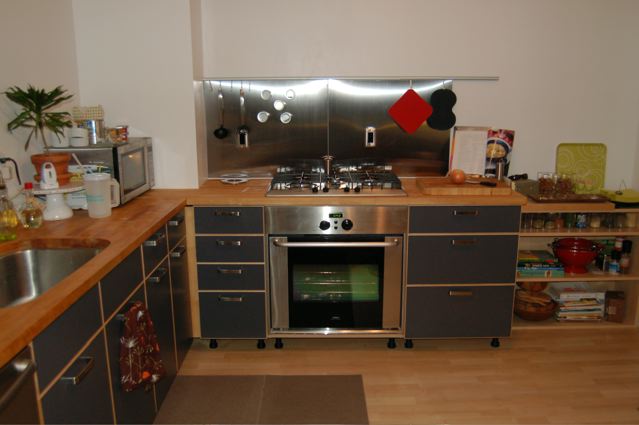
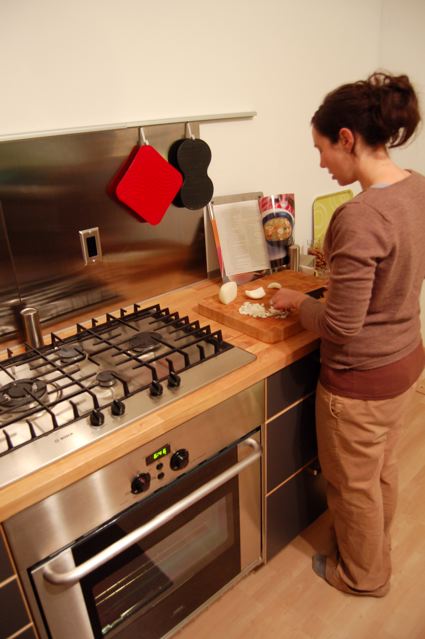
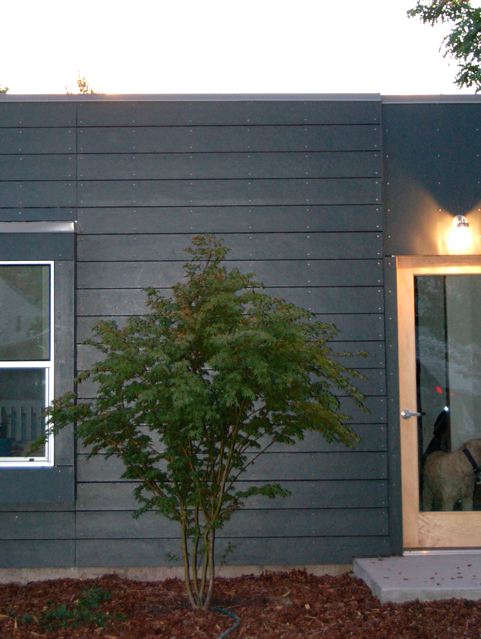
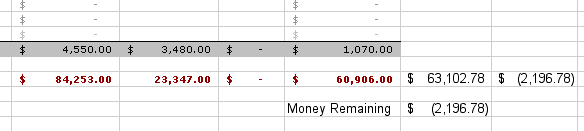
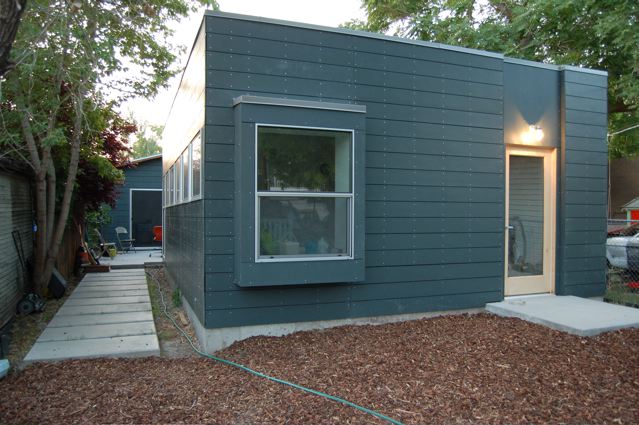
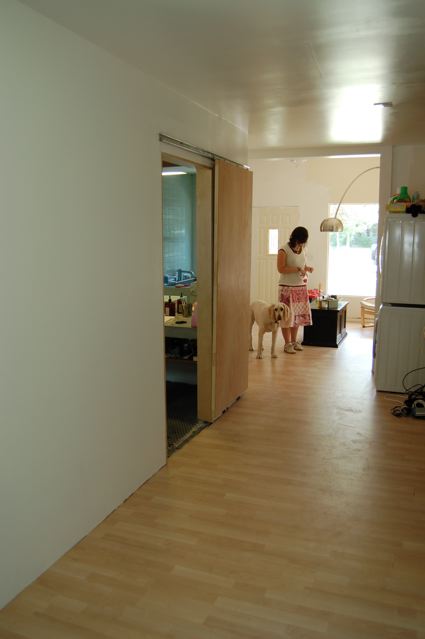
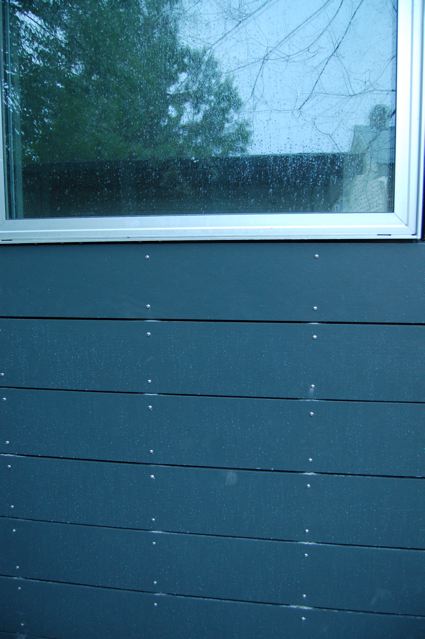
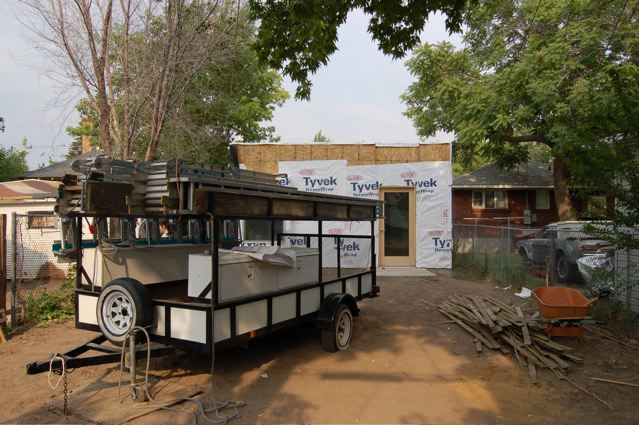
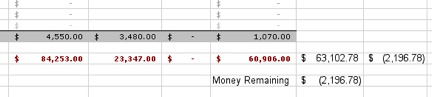
Our goal with our construction was to add two bedrooms for under $50,000, and we came pretty close. All the bids came in at $60,906. During construction, we did make some last minute changes. We had planned the kitchen remodel as phase two since it was not included in the original bid, and consisted of tearing out all our old cabinetry, moving our plumbing and framing in a $900 sliding door. We ultimately decided that to not add that extra sliding door out into the courtyard crippled the whole design. To afford the cost of that we ended up cutting all the cabinetry in the main hall. That extra $7,000 was quickly absorbed into the kitchen remodel and the unexpected increase cost of the siding labor.

In the end, we came in just a couple thousand over budget. $2,196.78 by our spreadsheet, but the reality is we paid for stuff out of pocket that isn't reflected there. Our loan to buy us out of our construction loan and original mortgage was for $172,000. With a new total square footage of 1,366 that puts it at $125 a square foot for the home and land. Our 600 square foot addition was built for $63,102 which puts it at $105 a square foot.

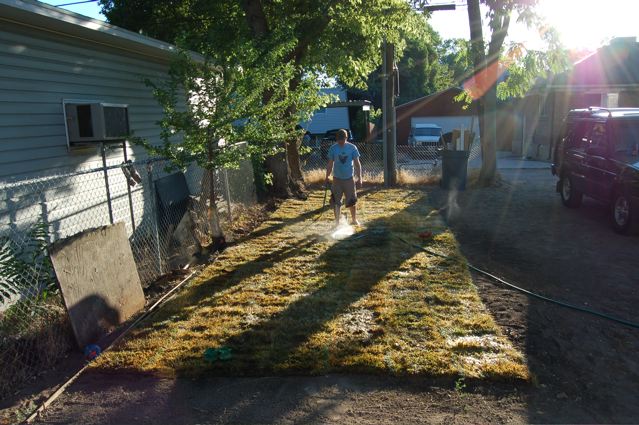
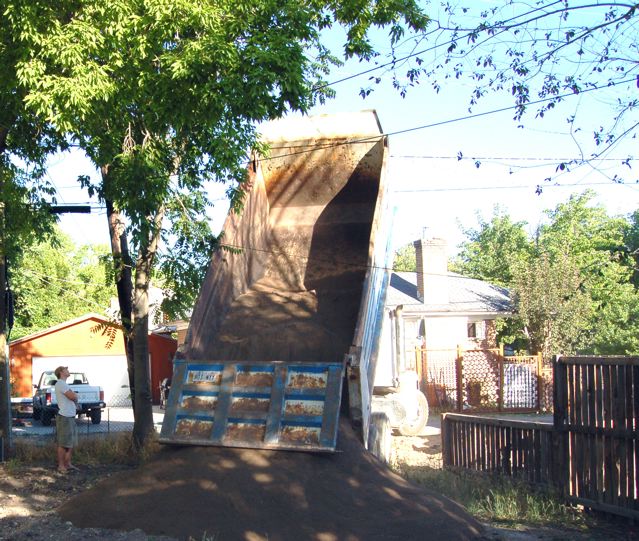
I estimate that we could probably spend another $5,000 - $10,000 in cabinetry and kitchen remodel before everything is really done inside and at around another $5,000 before all the landscaping is just how we want it. It's just nice to not be on a banks deadline anymore, and to have all the big projects done.

A big thanks to everyone for their encouragement and support, especially our close friends and family that came over and helped out during the last 6 months. We honestly couldn't have done it without you.
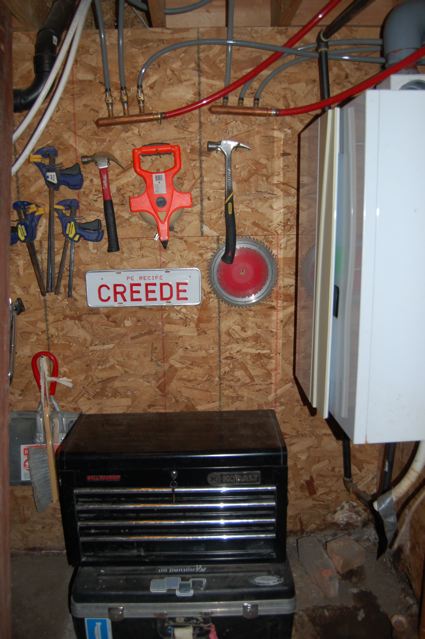
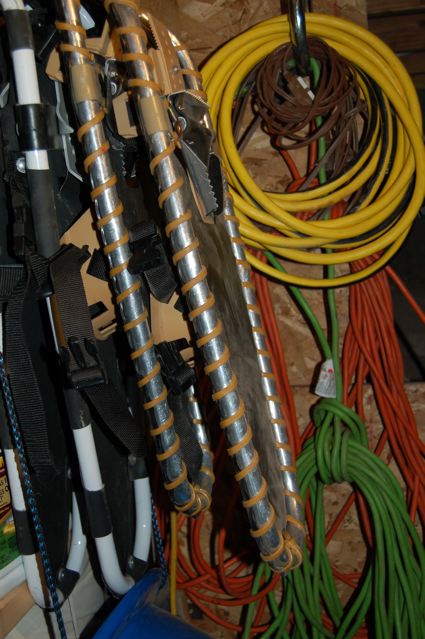
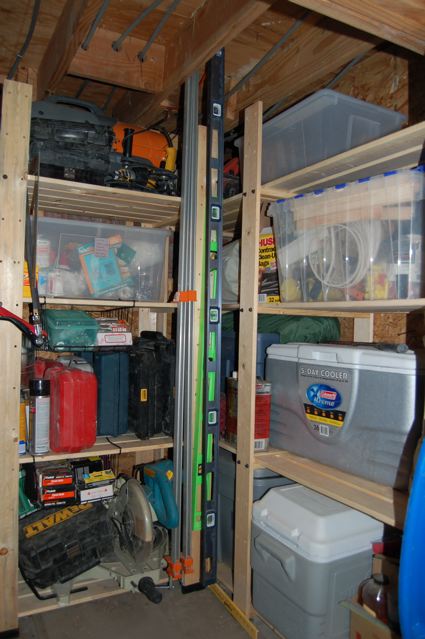
Exterior Photo Slideshow

Many of you have been asking for more pics, so I put a short slideshow together. I should be uploading one with music and better quality soon. I updated the video, and it's a lot better. Just click on the picture to start playing it. For a reference, the first shots with the maple door are the back of our house. Our house looks almost exactly the same from the front. In the courtyard area was the only place where we put new siding on the old house. As you can see from the pictures, we still need to redo the fascia and soffit.

Enjoy!

Avalisa Animal Patterns

 Images Uploads Fla Zoom 20070607144349As one of my favorite artists, and a sponsor of Grassrootsmodern, I keep a pretty close eye on Avalisa. I knew she had been working on some new prints, and it looks like they have finally made it to her website. Her Animal Patterns series takes silhouettes of different animals and repeats them in a pattern that is quite visually soothing. As with all of her artwork, each print is available in different sizes, and different colors. Some of the animal patterns are even available as a zoomed in version such as this Cool Deer Pattern Zoom shown here. Prices are as usual quite reasonable. Available from Avalisa from $59 up. Dsc 0005-27

Our Brown Blue Float print in our nursery.

Finished

Dsc 0050-4Last week, on Thursday morning, Benchmark was able to finally get the siding finished. It turned out to be a lot more labor intensive than everyone had expected, but it looks just as good as I had hoped. Brady Roofing also came over and finished the cap that goes around the top of the wall. I have been very impressed with them. I called them Tuesday afternoon to see how quick they could get it done, and they had a couple guys on it Wednesday morning. They finished up Thursday just before the appraiser came. I haven't heard the final number of what it appraised for, but I should find out today. I thought I would give the contact info for Brady Roofing since they don't have a website yet.

Brady Roofing Dymon B. Brady 2032 Farm Ridge Rd. Salt Lake City UT 84118 801-487-5151 Fax: 801-487-0796 dbrady@bradyroofing.net

More Flooring

Dsc 0001-31The last two weeks we have been scrambling to get all the loose ends tied up on our house. I mentioned before that our construction loan closed last thursday. We now have ten days to get a new mortgage to pay off our construction loan. Six months ago our estimated appraisal at the end of our project was $195K. Since then house prices have gone up, so we are getting it reappraised in hopes we can hit $215k which would give us 20% equity in our house. Last tuesday I spent the whole day putting in more laminate flooring in the old part of our house. We had covered the radiant tubing with a temporary floor, so I had to rip that all up and put down a new underlayment and then the laminate. We used the same Ikea Tundra in the maple finish. This time I bought the $10 Ikea installation kit, and it made all the difference in the world. All in all it turned out pretty nice. Ikea Tundra laminate flooring $1.29 square foot. Dsc 0003-26 Dsc 0001 2-8

The Siding Continues

Dsc 0003-24Our rainscreen siding has been a slow and tedious process. So far we are almost 4 days into it, and we are probably about 3/4 of the way done. Thanks to family and friends, we were able to get a bunch of it done this last Friday and Saturday. We hope it will all be done by today, or Tuesday. I have to admit though, that despite all the hard work, it's worth it. The look it gives the house is very distinct, and it really sets the tone for the whole addition. For those who have asked about some of the details, read on for a short explanation of exactly what we are doing and why.

Dsc 0005-26 The concept of a rainscreen is not a new one, although it has been utilized much more frequently in modern architecture in recent years. The basic idea is that you start with your exterior surface, and then add your waterproof layer. In our case we wrapped the whole house in Tyvec, and followed that with a layer of 15 pound building paper. We just used the building paper as a layer to black the house out, and not so much for it's waterproofing. To that layer you nail furring strips that will hold your final cladding away from the house. We used 1/2" pressure treated plywood that was ripped into 2/1/2" strips and then painted black. For our project we mounted the furring strip every 16" so we would be screwing into studs. Remember your furring strip layout will determine you screw pattern and your joints. Last you attach your cladding. I have seen some beautiful Ipe rainscreens, but since we were on a budget we went with hardie board. We actually used a 7 1/4" Hardie lap siding mounted with a 1/4" reveal between them. To make our reveals consistent we ripped down some 1/4 masonite to set between the siding as we mounted them. We found the best thing for cutting the Hardie siding was a pair of power sheers. Lastly for screws, we used a #10 pan head self tapping stainless steel screws with a square drive head. They were 1 1/2" in length. We got them online from McFeelys for about $450 for 4,000. Thats a lot of details, but hopefully that answers some questions for some of you. There haven't really been a lot of rainscreen applications that I know of that have been around for 15-20 years, so how it holds up is still to be seen.

More info about rainscreens here and here.

Starting the Rainscreen

Dsc 0014-10After a couple of delays we finally started putting up the siding yesterday. We ended up going with a dark grey called Iron Grey, and I absolutely love it. I was a little worried that it would be too "drama", but I think it's going to work out just fine. Benchmark Renovation is doing the rainscreen with the help of Bob who usually does aluminum siding. Despite the slow start, things are pretty much going the way they should. The pressure is on to get the house finished since the six months for our construction loan is up. We made our last draw to cover the cost of the siding yesterday, and now we have 10 days to refinance everything. That means that we need to get our home appraised again so obviously it needs to be finished.

 Pictures Bob-Athey-1 Bob the siding guy Dsc 0013-16 .

We Love Craigslist

Dsc 0004-15We were just sitting around on Saturday, not doing much of anything, when I decided to see if there was anything good on craigslist. I came across a post for free sod, and it was only about two hours old. It was a first come first serve deal so I drove by to see if there was any left. Originally there was about 3,000 square feet, enough to do our back yard several times. When I did my drive by the majority of it was still there, unfortunately I had taken the car, and not the Discovery. I hurried home and got the Disco, and was able to get in one good sized load, and a second small one before it was all gone. It ended up making a pretty good sized patch of grass in our back yard, and best of all, it was free. Thats the best kind of affordable!

The Siding Begins

Dsc 0004-14The siding installation on our house is going to be quite a bit different than what most people in the area are used to doing. Because of that we have had a hard time getting anyone lined up to do it. I had several people come over to quote the job, and then never heard from them again. Luckily we were able to get Benchmark Renovation back over here as they have experience with a rainscreen siding installation. The siding was supposed to be here by now, but there were some problems with the shipment. Hopefully it will get here soon. More details coming soon. Dsc 0002-21

Here’s The Dirt

Dsc 0008-14It's been a while since I have put any updates about our house. For the most part, things have been moving pretty slow for the past month and a half. We did manage to bring in some extra top soil to level our back yard out. I was able to find a place locally that would deliver 12 yards of topsoil for $190. That is a great bargain. If you don't know how much 12 yards is, look at the size of the dump truck bed compared to me. The whole thing was full of nice fresh dirt. At first I was worried I would have way to much dirt, but amazingly enough it took all 12 yards to level out our back yard the way we wanted it. Stay tuned for more news on the house, things are starting to move again!

Please excuse me while I pay some bills...